Every ASP.NET developer should already know about the Membership Provider that ships with ASP.NET 2.0. Configuring it is as easy as opening Visual Studio > select the Web project file > navigate to the Project menu item > and select “ASP.NET Configuration”. Follow the wizard and you are up and running now.
But the problem with this approach is that it will build it’s OWN database in the App_Data folder and create the required tables there. Wouldn’t most of us have their own databases to work with? ok then, if you want the defualt ASP.NET Membership Provide (AspNetSqlMembershipProvider) to work on YOUR database do the following:
-
Navigate to the folder: “C:\Windows\Microsoft.NET\Framework\v2.0.50727” and run “aspnet_regsql.exe”. Follow the wizard (it’s pretty easy, see the images below).
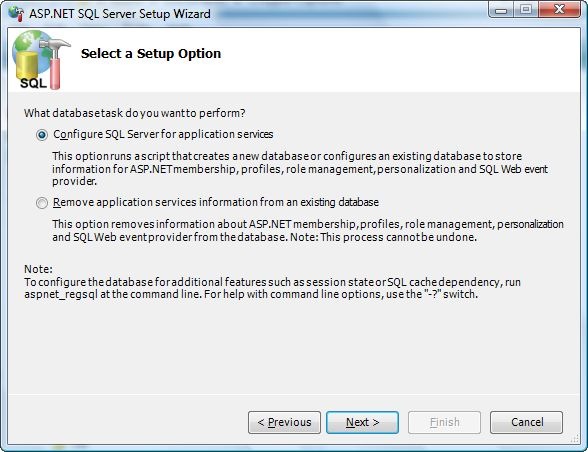
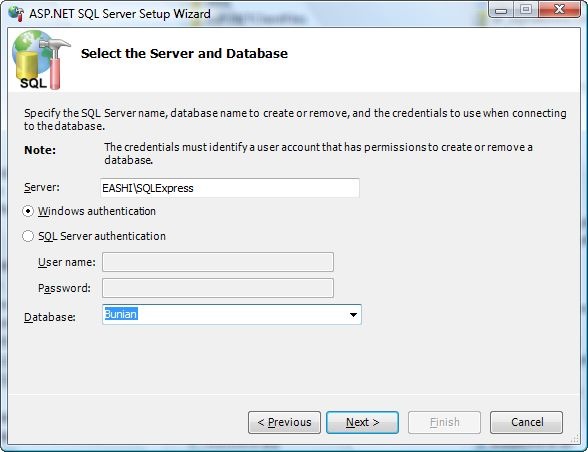
This step will create the Membership and Profile Provider tables necessary; if you are lucky you will see many
dbo.aspnet__something_tables. -
Now we need to tell the website which Provider it should use for this functionality, and to which database it should connect. The default configuration information that drives the default behavior of the default Provider resides in
Machine.config(C:\Windows\Microsoft.NET\Framework\v2.0.50727\CONFIG), which explains why you can’t find the configuration information in yourweb.configeven after using the ASP.NET Configuration mini-website.The best thing to do is to copy that configuration information from
Machine.configto your websiteweb.configin order to override its behavior to the desired one. For more information about configuration files and configuration hierarchy, read this.<membership defaultProvider="AspNetSqlMembershipProvider"> <providers> <clear /> <add name="AspNetSqlMembershipProvider" type="System.Web.Security.SqlMembershipProvider, System.Web, Version=2.0.0.0, Culture=neutral, PublicKeyToken=b03f5f7f11d50a3a" connectionStringName="BunianConnectionString" enablePasswordRetrieval="false" enablePasswordReset="true" requiresQuestionAndAnswer="true" applicationName="/" requiresUniqueEmail="false" passwordFormat="Hashed" maxInvalidPasswordAttempts="5" minRequiredPasswordLength="7" minRequiredNonalphanumericCharacters="1" passwordAttemptWindow="10" passwordStrengthRegularExpression="" /> </providers> </membership>Note the highlighted changes:
- Clear any previous configuration of
AspNetSqlMembershipProviderfromMachine.config; otherwise, you will get an “already configured” error. - Change the connection string name to the one your application uses to connect to your database.
- Clear any previous configuration of
This way you will have the default Membership Provider running on your database for your website; if you use the mini-site for the ASP.NET Configuration now and create new users, you will find them created in your database.
Note that some resources say that you can change the database from the ASP.NET Configuration but I couldn’t find it there.
Disclaimer: use the above on your own responsibility 🙂